
- Requirements
- Current Version
- Download
- Installation Trouble
- Log In
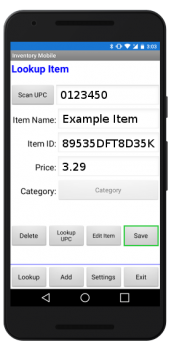
- Lookup Item
- Add Item
- Edit Item
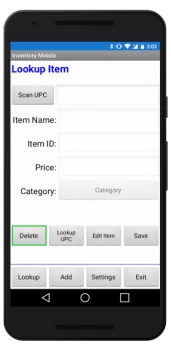
- Delete Item
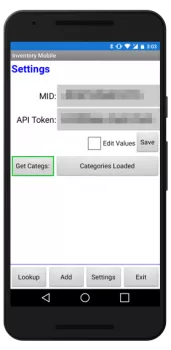
- Settings
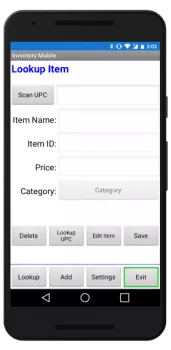
- Close Application
- Security
A Clover merchant account and phone or tablet with Android 4.4.2 ICS is required.
IOS is not supported at this time.
Your phone or tablet must be able to scan barcodes either by utilizing the phones built in barcode scanner, camera, or bluetooth/wired barcode scanner.
Inventory Mobile 2.0.56
Notice: To update to Version 2.0.56, uninstall the old version only from your mobile device, redownload Inventory Mobile and install manually. Auto update is not yet available in versions past 2.0.0.
To download Inventory Mobile, visit the following link on your Android device and click the download link from the app’s webpage.
Inventory Mobile is a 3rd Party App. On some devices you should allow installation from “Unknown Sources”.
This can be done by going to: Settings > Security > Check Unknown sources.
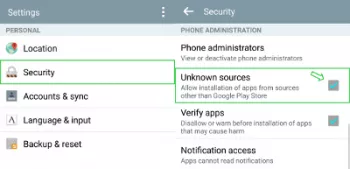
This allows installation of apps from sources other than Google Play Store.
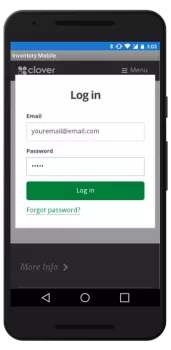
Upon first downloading and installing Inventory Mobile, you will be prompted to Log In to your Clover account. This way, the app can gain the appropriate security level to access Read and Write privileges to the inventory in your Merchant Account.
Sometimes the Access Key used expires and you may be prompted to Log In later. Expiration of OAuth Keys is set by the Clover Server.
There are two ways to to lookup an item already in your inventory.
1.) Click the Lookup button at the bottom of the screen. Click the Scan UPC button. The app will open your camera or barcode scanner interface. Align the item’s barcode in the view window. Upon successfully reading the barcode, there will be a beep. And the item’s information will be displayed. If the item is currently not in your inventory, the Add Item window will open. Click here to learn how to add an item to your inventory.
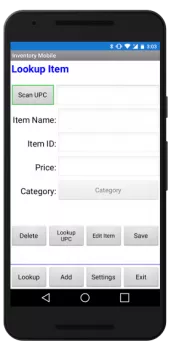
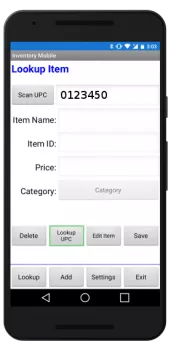
2.) You can manually type the barcode then click the Item Lookup UPC button at the bottom of the screen. This works exactly the same as scanning a barcode. If the item is not currently in your inventory, the Add Item window will open. Click here to learn how to add an item to your inventory.
To add an item to your inventory, click the Add button at the bottom of the screen. Scan the barcode. If the item is currently in your inventory, the lookup item window will open. You can also manually type in the barcode. Type in the Item Name,, Item Price, select a Category, then click Save. The Save button will not be enabled unless all information is entered and a category is selected.
At this time, Categories must be setup in your Clover system as there isn’t a way to add Categories in the app.

To edit an item, click on the Lookup button at the bottom of the screen. Click on Item UPC and scan the item’s barcode. You can also manually type in the barcode and click Lookup UPC.
When the item information is displayed, click on the Edit Item button. This will enable the fields so you can edit the Item Name or Price. After you have completed changing your item information, click the Save button.
To delete an item, lookup the item by scanning or typing in the barcode. Then tap the Delete button. You will be prompted to confirm you want to delete the item.
The inputs on the Setting screen should not be changed unless asked to do so by Support.
After editing your Categories in your Merchant Account, you will have to Reload the categories by clicking on Get Categs.
To exit the application at any time, click on the Exit button at the bottom right of any screen.
Inventory Mobile uses OAuth 2.0. Your Clover login information is never saved on your device or on our server. Your Merchant ID and the API Token is shared by the Clover Server after successfully logging in using your valid email address and password.
We will never ask for the login information you use to log in to your Merchant account! We may ask for your MID and API Token for troubleshooting a problem and developmental purposes when contacted.
Do not share your MID or API Token in the comments section below.