Thank you for your interest and downloading Inventory Mobile.
This document is to help you become familiar with Inventory Mobile and help guide you through using the mobile application and it’s features.
- Requirements
- Current Version
- Download
- Installation Trouble
- Logging In
- Main Menu
- Item List
- Adding an Item
- Adding or Deleting a Category
- Stock Count
- Settings
- Support
- Share
- Updates
- End User License Agreement
Requirements
A Clover merchant account and phone or tablet with at least Android 6.0 Marshmallow is required.
IOS is not support at this time.
Your phone or tablet must be able to scan barcodes either by utilizing the phone’s built in barcode scanner, camera, or wireless/wired barcode scanner.
Current Version
Inventory Mobile 2.0.810-Beta
Note: To update to 2.0-Beta, uninstall the old version from your mobile device only, then re-download the application and install manually. Auto update is not yet available in versions past 2.0.0.
Download
To download the latest beta of Inventory Mobile, visit the Support Site.
Installation Trouble
Inventory Mobile is a 3rd Party mobile application and is installed on a separate Android tablet or mobile device.
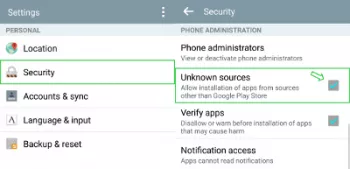
On some devices, you should allow installation from “Unknown Sources”.
This can be done by going to: Settings > Security > “Check” Unknown sources.
This allows installation of apps from sources other than the Google Play Store.
Logging In
Upon first downloading and installing Inventory Mobile, you will be prompted to Log In to your Clover account. This way, the app can gain the appropriate permissions to access Read and Write privileges to the inventory in your Merchant Account.
Sometimes the Access Key used will expire (usually in 1 year) and you may be prompted to Log In later.
Expiration of Access Keys is set by the Clover Server.
The first screen you come to when first opening Inventory Mobile is the Welcome screen.
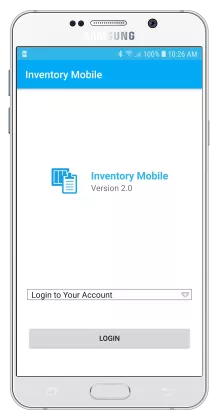
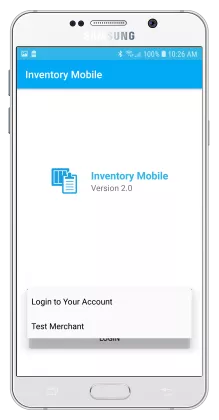
The first screen you come to when first opening Inventory Mobile is the Welcome screen.
Here you can either Login to your Clover account or select the Test Merchant to try the application.
Select either “Login to Your Account” or “Test Merchant” from the drop down menu and tap LOGIN.
If you selected Test Merchant, you won’t have to enter any login information. Although, you won’t have access to you inventory items since this is only a sandbox for merchants to try out the application before subscribing.
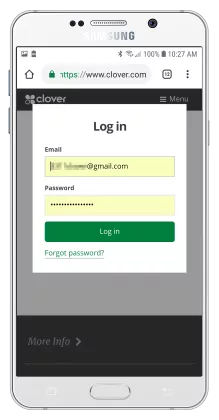
By selecting “Login to Your Account” and clicking LOGIN, Inventory Mobile will open a secure browser window so that you can log into your merchant account. The email and password is the same that you would use to log into Clover’s web portal.
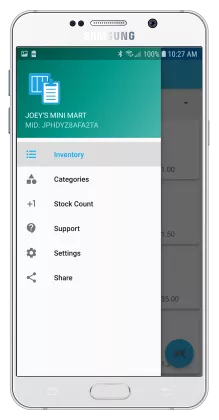
Main Menu
The application menu can be accessed by tapping the “hamburger” icon in the top left of the screen.
From here, you can access all the features of Inventory Mobile.
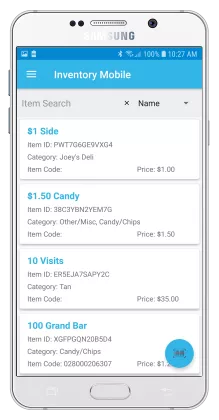
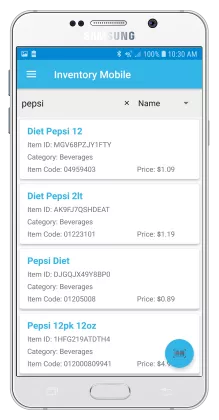
Item List
The item list is the next screen and subsequent start screen that will open when you start the application.
On this screen you can scroll through a list of all your inventory items (list alphabetically) and tap on an item to edit the information for that item.
You can search for an item on this screen by typing the item name into the search bar and you can scan a UPC by taping the blue barcode icon into the bottom right of the screen.
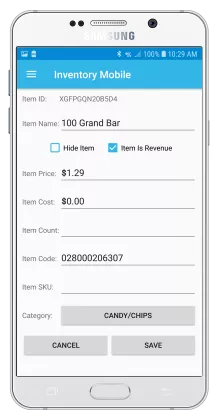
When you tap on an item in the list, you can edit it’s information. I.e. Name, Price, Cost, Count, etc.
Adding an Item
If you scan an item that is not currently in your inventory, the previously mentioned screen will open allowing you to enter the item’s information.
Adding or Deleting a Category
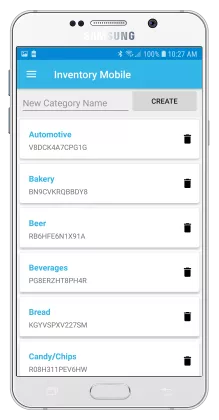
To add or delete a Category, tap “Category” in the menu.
Here you can add or delete a category. It’s as simple as entering a name and taping “Create”. You will have to associate any items you want to appear in that category by editing the item information.
You can delete a category by clicking on the Trashcan icon beside the category.
Warning: If you delete a category, none of the items in that category will be deleted. However, if you accidentally delete a category, you will have to create the category again and associate the items with that category.
Stock Count
This is a separate feature of Inventory Mobile, requested by many merchants. This feature will not change the Item Count that Clover keeps track of and you can conduct an inventory of your stock.
When you tap “Stock Count” in the menu, it will open this screen.
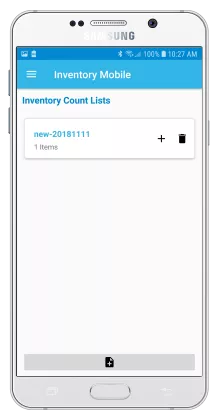
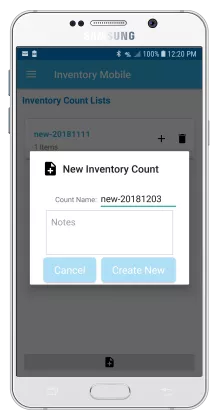
Here you will need to click the bottom at the bottom of the screen to create a new count list. A default name is given to each new count list, you don’t have to change the list name if not necessary.
You can start counting items by taping the + (Plus) icon beside the list.
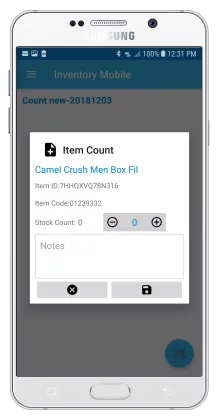
The screen that opens will allow you to start counting your stock. Tap the blue barcode icon in the bottom right of the screen and scan your first item.
A popup will open allowing you to add an item count that is physically in stock with any notes. Notes for each item is not required, but it may help when you get a different count than what Clover has. Such as over, short, or damaged.
To save your count, tap the “Plus” icon. To cancel, click the “X”.
You can count as many items or create as many lists as you need to. This information is saved on your device and will only be deleted if you uninstall the application from the mobile device or manually delete them.
*You will be able to email, save, and print your lists in future versions.
Settings
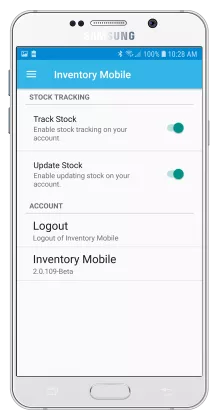
The settings screen is accessible by taping “Settings” in the menu.
You may get this screen to enable stock tracking after you login. If you do not wish Clover to manage your stock count, you can leave these two options turned off.
You can logout of Inventory Mobile from this screen by simply tapping “Logout”.
The version number of Inventory Mobile is also listed on this screen. You can check your version to the the version available on the Support Site to see if there is a new version to download.
Support
You can contact Support by taping “Support” in the menu.
From here, you can select an email client to contact us if you have an issue, suggestion, or need help.
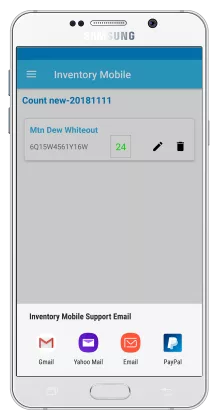
The email generated will contain device specific information to help our support team with your inquiry. You are asked not to delete any of the generated information and you can add details of your inquiry at the top of the email.
Share
Sharing is not implemented in the Beta version at this time.
Updates
Inventory Mobile can be updated by downloading and installing the application from the Support Site. To retain the current data, do not uninstall the application from your device.
End User License Agreement
The full EULA can be viewed on the Support Site at the following link.
https://www.jonathanryangrice.com/blog/inventory-mobile/inventory-mobile-eula
